EtherCAT – First Steps
For EtherCAT communication, the Ethernet ports of the controller that are connected internally via a switch must be disconnected. EtherCAT communication is only permitted via port X2.
- To separate the ports, first open the WBM of the controller that is to be used as the EtherCAT master. To do so, enter the IP address of the controller in the browser and log in.
- On the “Configuration” > “Networking” tab of the WBM, click “Ethernet Configuration.”
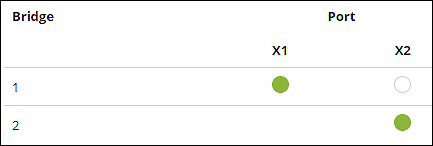
- Select port X2 for bridge 2 (also referred to as “br1” in CODESYS) to separate the ports.
- Then reboot the controller.
- Now add the controller to your CODESYS project.
- First, double-click on the controller to open the configuration.
- Configure the gateway and enter the IP address of the controller.
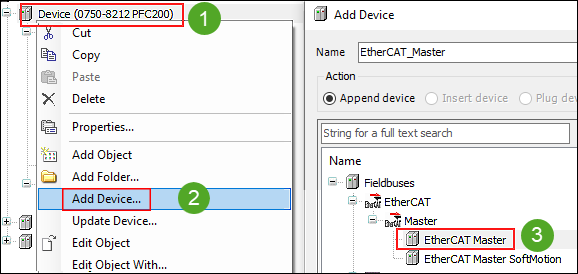
- Right-click on the controller and click Insert Device ....
- Select the “EtherCAT Master” item in the tree under “EtherCAT” > “Master” and click [Insert Device].
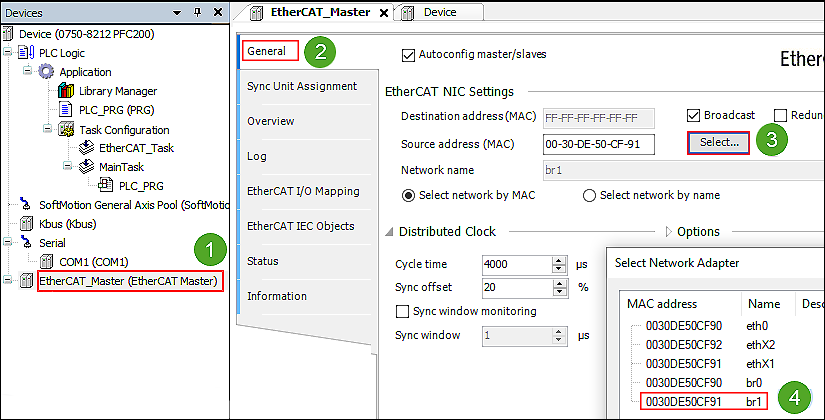
- To configure the EtherCAT master, double-click it in the device tree.
- Click [Select ...] on the General tab of the EtherCAT configuration to specify the network adapter that is to be used, i.e. the EtherCAT interface.
- Select the “br1” item. This identifies the EtherCAT interface on port X2.
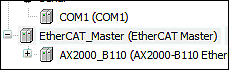
- Right-click on the “EtherCAT_Master (EtherCAT_Master)” in the device tree and select Insert Device ....
- Select a (previously installed) EtherCAT slave from the list and click [Insert Device].