Project Conversion on the Example of EtherCAT
Initial state:
In this example, an e!COCKPIT project consisting of a PFC200 (750-8212) as the master with a connected CANopen coupler (750-354) as the slave is converted. For the coupler, a device description (ESI) has been installed in e!COCKPIT via the Backstage View > Product Catalog > [Import Device]. Four I/O modules are plugged into the coupler. Variables have been created for the input/output data.
Important: In e!COCKPIT, right-click on the EtherCAT coupler and use [Export] to save a CSV file. The CSV file contains the I/O image with all the variable names; you will reimport these into CODESYS.

In brief:
In the following description, you perform the following steps in CODESYS: You create a copy of the master device to back up the EtherCAT data. You then update the master device to the current CODESYS device description. The EtherCAT data (fieldbus, slave and variables) is lost. You now import the slave device via an ESI file. You will then insert an EtherCAT master into the device tree and copy the EtherCAT slave from the device copy, with the variables it still contains, under the newly created EtherCAT master. In order to use the variables from e!COCKPIT, import the I/O image (CSV) for the EtherCAT slave.
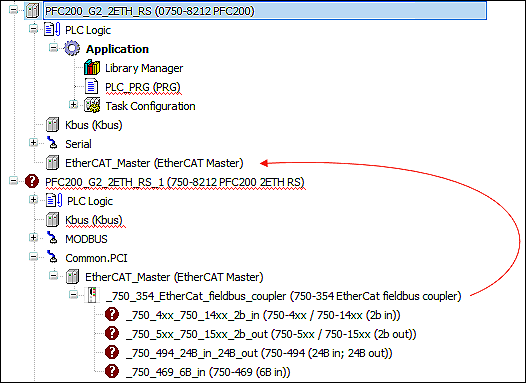
- First click “Common.PCI.” Here you will find the EtherCAT master and slave.
- Now first create a copy of the controller in the device tree: Right-click on the controller and select Copy.
- Then right-click on the project name at the top of the device tree and select Insert.
- A copy of the controller has been created. You will use the EtherCAT data of the copy later.
- Now swap the e!COCKPIT device description of the original device that it still contains and the CODESYS device description. To do so, right-click on the controller and select Update Device ....
- Select your device – in this case, the 750-8212 device – under “Controllers (PFC)” and click [Update Device].
- The device is updated. In the device tree, the red question mark symbol disappears. However, the substructures with the EtherCAT data (previously under “Common.PCI”) are also deleted.
- Restore the configuration. For this, the ESI file of the EtherCAT slave must be installed (see 8 Installing WAGO Device Descriptions separately).
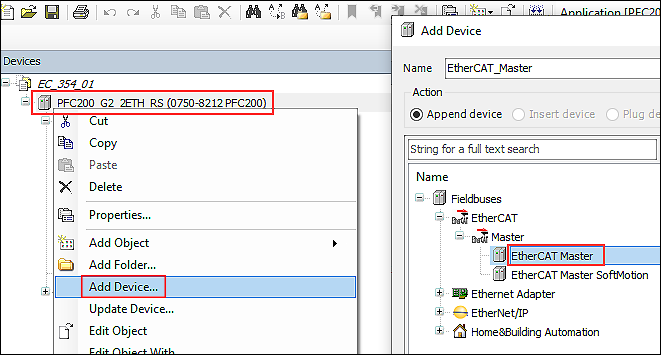
- Now recreate the EtherCAT structure of your project. In the device tree, right-click on your device and select Insert Device ....
- Select the EtherCAT Master.
- Now copy the EtherCAT coupler (750-354) from the device you backed up at the beginning and add it again under the newly created “EtherCAT master” (you can also drag and drop it).
- Delete the device that was copied at the beginning.
- For all I/O modules marked with a question mark in the device tree, right-click Update Device ....
- In the dialog, select the appropriate device description for the selected device.
- Click [Update Device].
- The device descriptions are updated, and the question mark symbols disappear. However, the variable names assigned in e!COCKPIT for the input/output data are still missing.
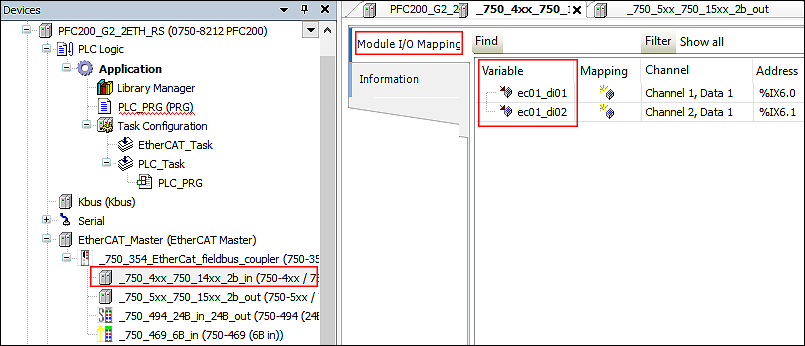
- Right-click on the EtherCAT device and select Import mappings from CSV ....
- The variable names are carried over. You can use all the variables in the new device as usual.