Project Conversion Example: PFC200
In the following example, a PFC200 750-8217 is migrated from e!COCKPIT (firmware version 22) to CODESYS (firmware version 24).
A PFC200 750-8217 is used as an example; the example also applies to other PFC200 devices.
- To export the “Local Bus I/O Mapping” shown under the device to a CSV file, go to the “DEVICE” tab and click [Export I/O mapping] on the ribbon.
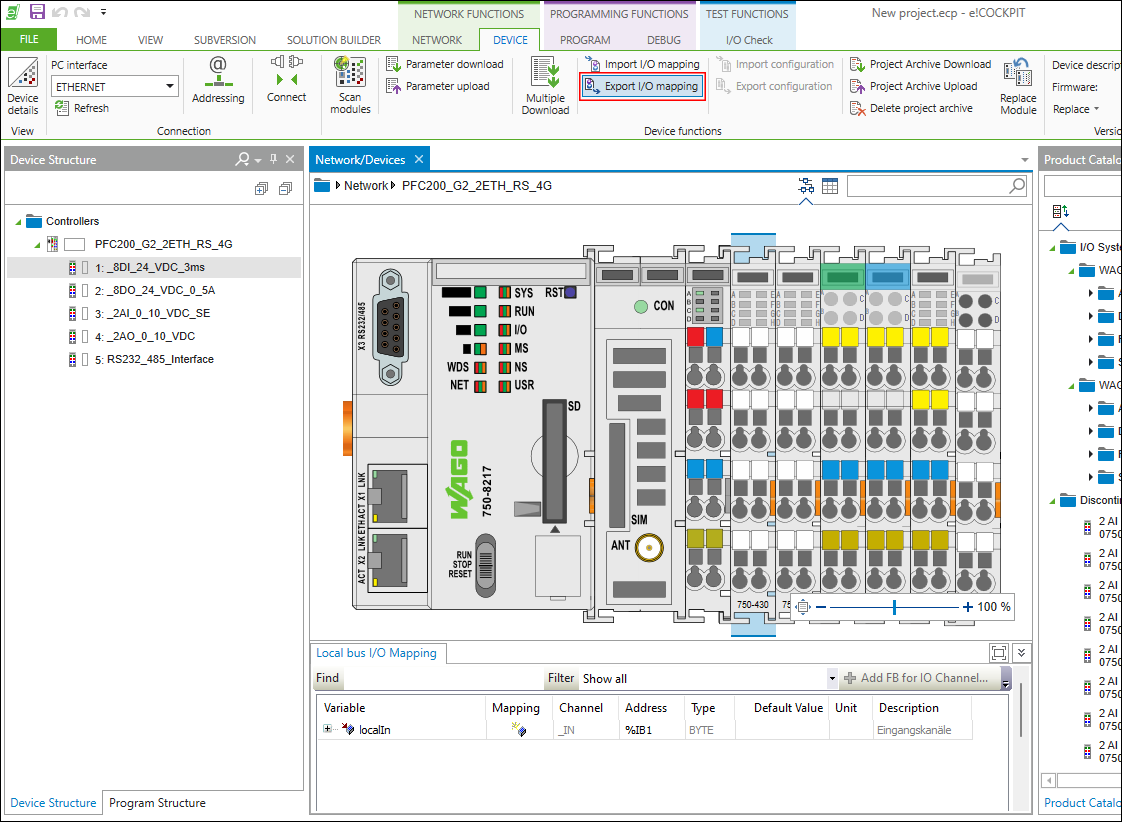
- Provide a filename for the export file and click [Save].
- Save and close the project in e!COCKPIT.
- Copy the project file.
- Change the file extension of the copy from “.ecp” to “.project.”

PFC200_G2_2ETH_RS_4G.csv
TestProjektPFC200_750-8217 – Copy.project
TestProjektPFC200_750-8217.ecp- Open the project with the new extension in the CODESYS version that matches the firmware. Version information can be found in the release notes that accompany the downloaded firmware packages.
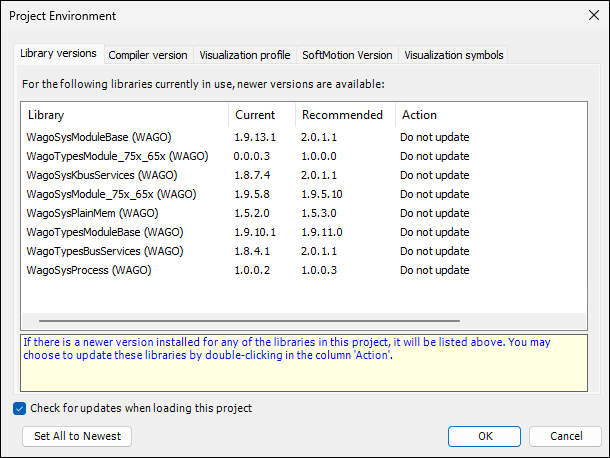
In this example, the project is opened in CODESYS V3.5 SP18 Patch 2. This CODESYS version is compatible with firmware version 24. - Click [OK] to confirm the dialog for updating the project environment.
- Confirm that the project’s saving format has been updated by clicking [Yes].
In future, further processing of the project will only be possible in CODESYS. 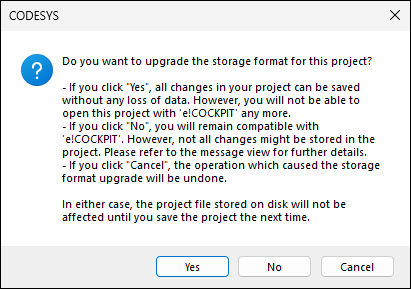
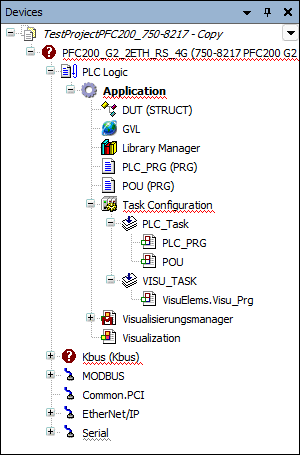
- The opened project is displayed in CODESYS as follows:
- Right-click on the project name in the device tree at the top and select “Add Device” from the context menu.
- In the dialog, select the new target device, in this case “750-8217 PFC200.”
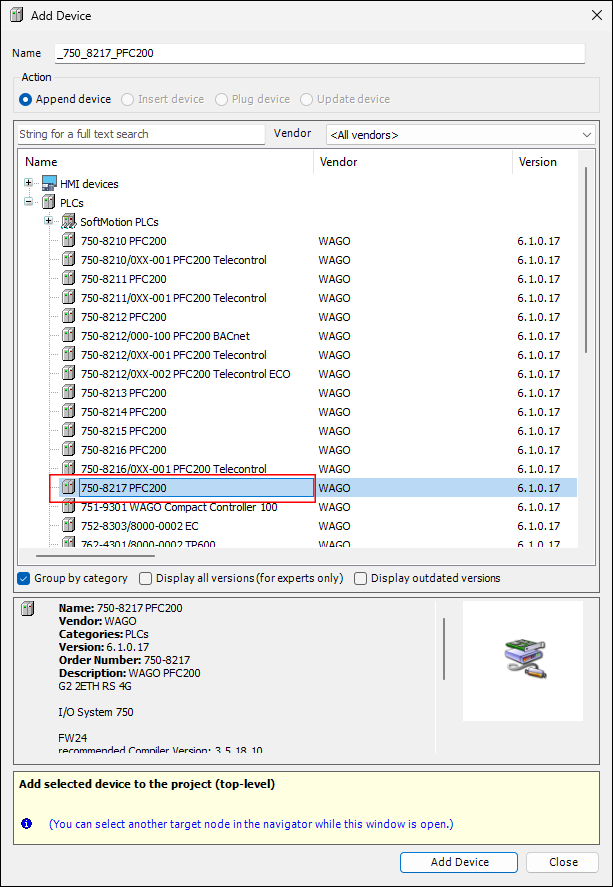
- Click [Add Device] and close the window.
- The device is attached to the tree:

- Delete the library manager for the newly attached device.
- Now copy all the elements of the old device under “Application” and insert them back into the new device under “Application.”

- Now copy all the elements of the old device under “Kbus (Kbus)” and insert them back into the new device under “Kbus (Kbus).”
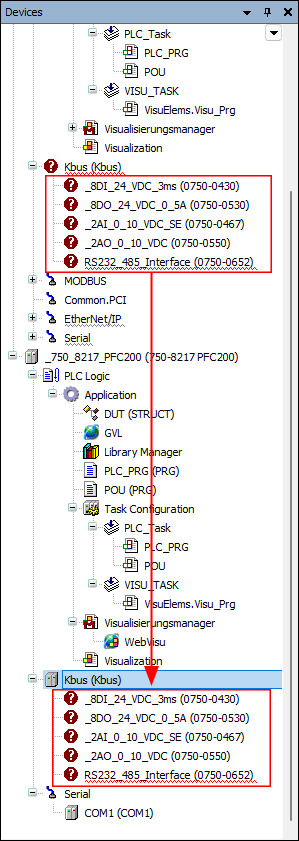
- The question marks in red circles indicate that these I/O modules still need to be updated with the latest device description.
- To do so, right-click on one of the I/O modules and select “Update Device ....”
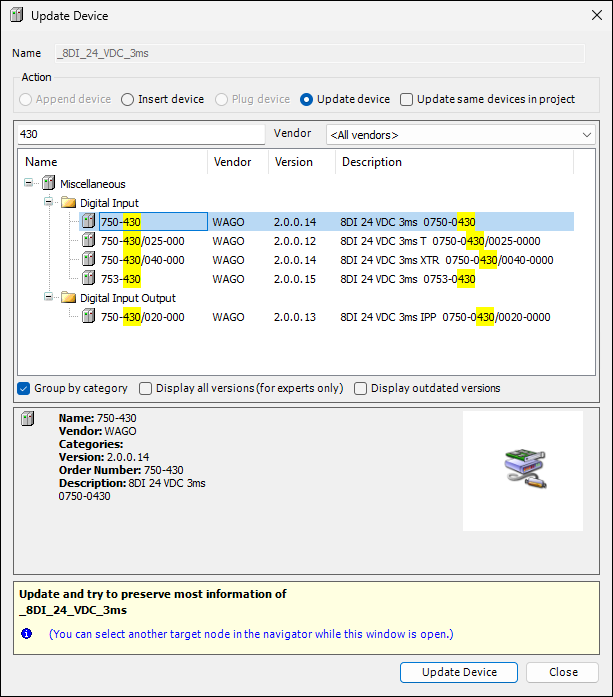
- Repeat the procedure for all I/O modules until all the I/O modules have been updated and no more question marks remain.
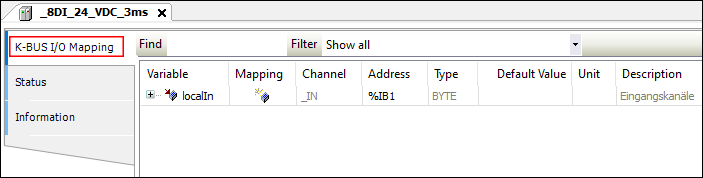
- Click on the I/O modules to open the “K-BUS I/O Mapping” tab on the right.
- The variables from the I/O images of the I/O modules appear here. After the update, the variables are initially missing. The I/O images must be imported from the CSV file.
- To do so, right-click on “Kbus (Kbus)” and select “Import mappings from CSV...” from the context menu.
- Select the CSV file you saved in e!COCKPIT and open it.
- The variables from the CSV file are loaded and displayed on the “K-BUS I/O Mapping” tab, similarly to how they are in e!COCKPIT.
- Since you no longer need the old device, delete the old device from the project tree.
- Save and close the project.
- Reopen the project.
- Update the project environment by clicking [Set All to Newest].
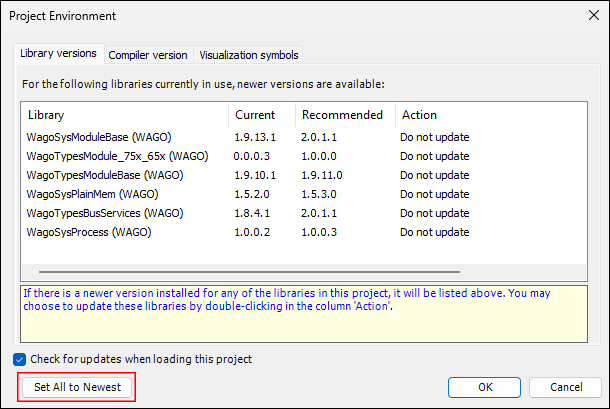
- Click [OK] to confirm.
- Save the project.