Attaching an I/O Module
- Position the I/O module in such a way that the grove and spring are connected to the preceding and, if applicable, the following components.
- Press the I/O module into the assembly until the I/O module snaps onto the DIN-rail.
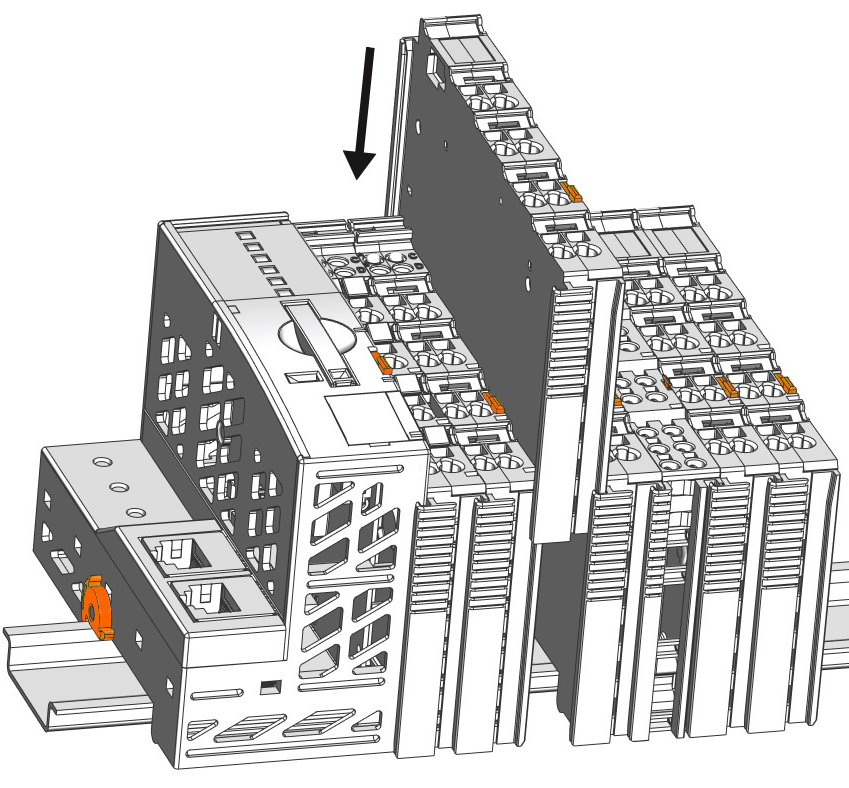
- Check that the I/O module is seated securely on the DIN-rail and in the assembly.
- Once the I/O module has snapped into place, the electrical connections are establish for the data contacts and power contacts (if any) to the head station or to the preceding and, if applicable, following I/O module.
Adding the Wiring Interface of the 753 Series
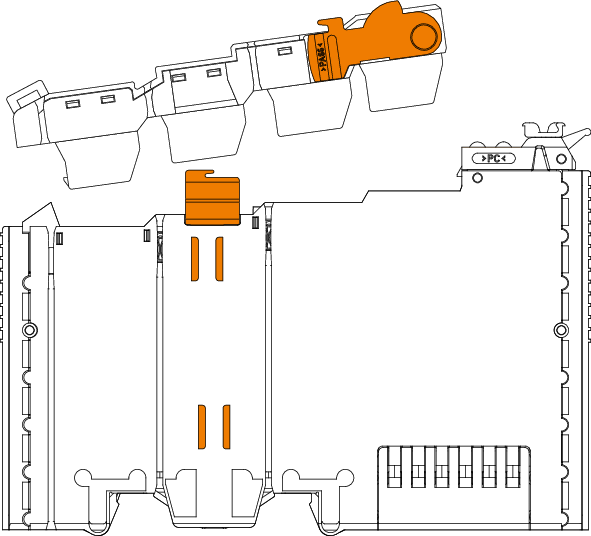
- Make sure that the locking tab of the I/O module is not pulled out.
- Place the wiring interface on the I/O module.
- Press the wiring interface onto the I/O module until it clicks into place completely.