Integrate Star Distributor (Junction) in an EtherCAT Network
EtherCAT supports various topologies such as line, tree or star topology. So-called EtherCAT junctions can be used to implement star topologies. These devices already have an internal star distribution and various ports to which further EtherCAT slave devices can be connected.
The basic procedure for configurations with junctions in e!COCKPIT largely corresponds to the description under Connect Controller (Master) to Fieldbus Coupler (Slave). In this case, too, the devices, including the junction, are first configured in the Topology view and then in the Communication view.
- EtherCAT Master and Junction in the Topology View
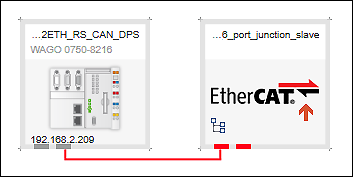
- EtherCAT Master and Junction in the Communication View
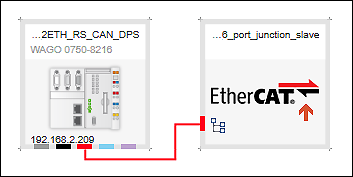
An icon in the junction tile indicates whether other EtherCAT slaves are connected to the junction:
|
EtherCAT slaves are already connected to the junction. |
|
No EtherCAT slaves are connected to the junction yet. |
EtherCAT Slaves Connected to the Junction
- To connect EtherCAT slaves to the ports of the hub, first double-click on the junction.
- A tabular Detail view for the junction opens.
The product catalog shows suitable EtherCAT slave devices (and other junctions) to connect to the junction. - Drag and drop the devices to be connected from the product catalog to the respective ports of the junction.
Note: Nesting is possible if you connect another junction to a junction port. 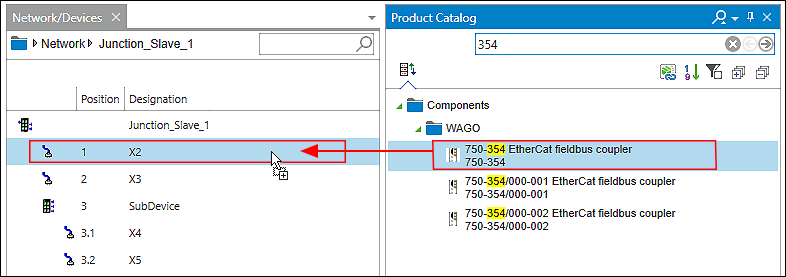
Change Settings for Devices on a Junction
Devices connected to a junction do not appear in the Network view. You can always get to these devices via the Detail view of the junction itself. Settings and nameplate information are displayed based on the selected device (tree element):
- If a slave or junction is selected, the data of the slave or the junction is displayed.
- If a connector, I/O module or slot is selected, the data of the parent element of the connector, I/O module or slot is displayed.
- If no device is selected, the information of the top device in the tree (e.g., that of a junction) is displayed.
- To open the Detail view for the junction, click the junction in the Communication or Topology view.
- Select a device to change in the junction tree.
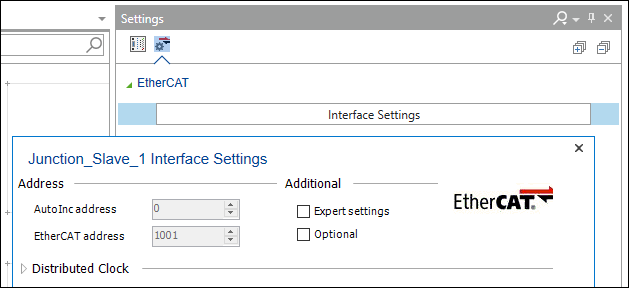
- The settings of the selected device are displayed in the “Settings” control panel (“EtherCAT” tab > [Interface Settings] button).
- Make your changes.
Note on Status and Diagnostics
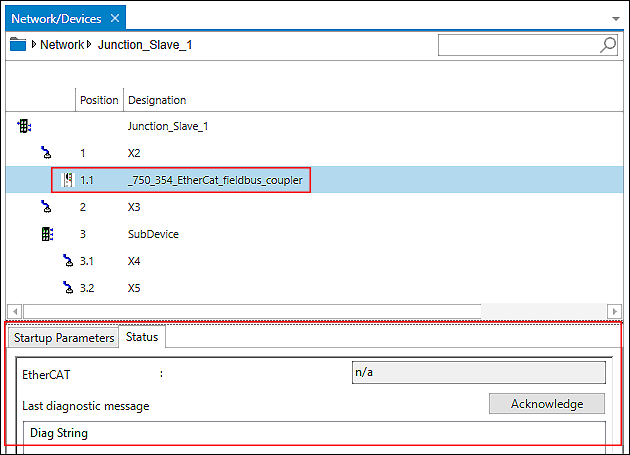
If a slave device connected to the junction experiences an error, this error state is also displayed at the junction (e.g., via the four-part status indicator). To check which of the connected slave devices is affected, open the Detail view of the junction and go through the individual devices. A “Status” tab is displayed below the junction tree, which shows the diagnostic status of the currently selected device.
