Setting up I/O Configuration
- Controllers with ctrlX OS and WAGO nodes are configured and connected online.
- ctrlX WORKS is installed.
- The device description for the EtherCAT master has been downloaded.
- Open the Web interface on the controller. Enter the IP address of the controller in your browser and log in (username: wago, password: wago).
- Install the ctrlX EtherCAT Master app via Settings > Apps > [Install from File].
- Load the license file onto the controller (see 8 Loading a License File onto the Controller).
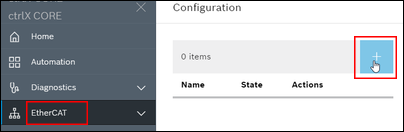
- To enable/add the EtherCAT Master on the controller, click under EtherCAT > Configuration on [+].
- Enter the name and port for the EtherCAT Master and click [OK].
- To configure the EtherCAT fieldbus subscribers, click the [ctrlX I/O Engineering] button.
- The locally installed “ctrlX I/O Engineering” opens.
- Select a project name and a folder where the I/O configuration is to be saved.
- After “ctrlX I/O Engineering” is started, a dialog opens. In this dialog, select [Use project from ctrlX].
- To install the device description file for the EtherCAT Master, click the menu item Tools > Device Repository... > [Install...].
- Select the device description file “WAGO_750-0354_xx.xml,” click [OK] to confirm and close the “Device Repository.”
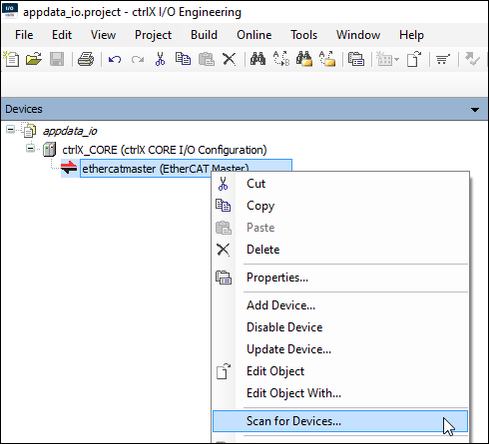
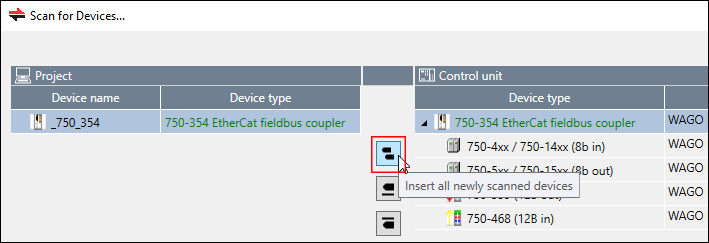
- To add the 750-354 EtherCAT Fieldbus Coupler, click Scan for Devices... in the device tree in the context menu of “ethercatmaster (EtherCAT Master).”
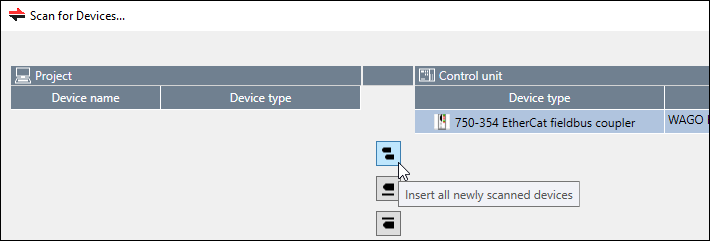
- Click the [Insert all newly scanned devices] button.
- Close the dialog by clicking [OK].
- The EtherCAT Master is added.
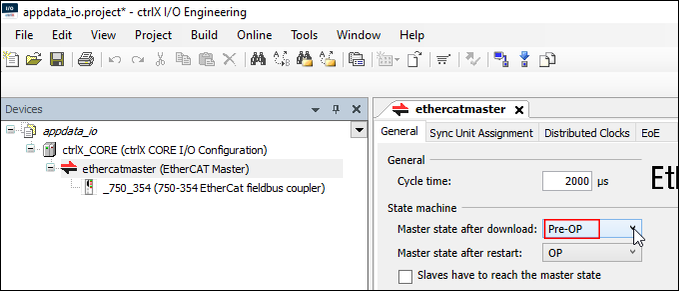
- In the device tree, click “ethercatmaster (EtherCAT Master)” and select the “Pre-OP” operating mode in the “Master state after download” field under “State machine” in the “General” tab.
- To apply the configuration, click Transferring field bus configuration in the device tree in the context menu of “ethercatmaster (EtherCAT Master).”
- Confirm the change of operating mode to “Init” in the pop-up window.
- In the device tree again, click Scan for Devices.. in the context menu of “EtherCAT Master (EtherCAT Master)” to add the installed I/O modules.
- Click [Insert all newly scanned devices].
- Close the dialog by clicking [OK].
- The I/O modules are added.

- In the device tree, click “ethercatmaster (EtherCAT Master)” and select the operating mode “OP” in the “Master state after download” field under “State machine” in the “General” tab.
- To apply the module configuration and start the data cycle automatically, click “Transferring field bus configuration” in the device tree in the context menu of “ethercatmaster (EtherCAT Master).”
- Confirm the change of operating mode to “Init” in the pop-up window.
- Save the I/O configuration via File > Save and exit “ctrlX I/O Engineering.”
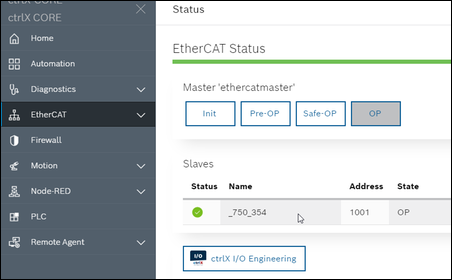
- Check the status of the EtherCAT fieldbus in the Web interface of the controller. To do so, click EtherCAT > Status.
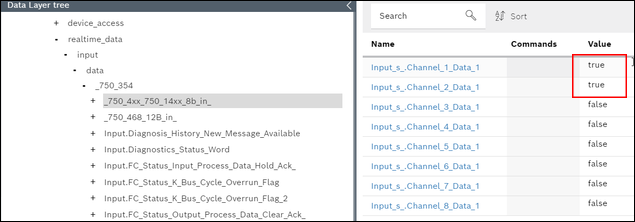
- Check the data exchange. To do so, click System > Data Layer.
In this example, digital outputs 1 and 2 are bridged via hardware with digital inputs 1 and 2.
Manual overriding of the two outputs “Output_s_.Channel_1_Data_1” and “Output_s_.Channel_2_Data_1” of “_750_5xx_750_15xx_8b_out” could be read back by input module “_750_4xx_750_14xx_8b_in” at the inputs “Input_s_.Channel_1_Data_1” and “Input_s_.Channel_2_Data_1.”