Replacing firmware
 NOTICE
Follow instructions to avoid damage to equipment
Interrupting the update/downgrade process may damage the device. For this reason, observe the following information.
Notes Hardware
- Do not switch devices off.
- Do not interrupt the power supply of the device.
- Do not remove devices from the node group.
- Ensure that communication with the device is not interrupted during the update/downgrade process.
- If replacing the firmware via the service interface, disconnect the fieldbus cable from the device beforehand.
- Do not exit the software during the operation.
- Only perform the update/downgrade from a local hard disk.
Notes Software
- Stop applications on the device before the update/downgrade process.
- Programs and data on the device can be lost when replacing the firmware. Make sure you have a recent backup of the data.
- The application and other files in the memory or file system must be transferred to the new controller after replacing the firmware.
- After the update/downgrade, note the new firmware version (xx) in the box on the controller.
 Note
Note
Disclaimer when changing the firmware!
Liability claims against WAGO GmbH & Co. KG regarding material or immaterial damage caused by changing the firmware are excluded. Use is at the risk of the user exclusively.
Note
Additional Information from WAGO Support!
Additional information about the firmware update is available from WAGO GmbH & Co. KG Support.
Note
Connection information as a prerequisite for replacing the firmware!
It is necessary to define connection settings for each device for which you want to update/downgrade. The settings are necessary to access the controller (see points below).
- Open the “DEVICE” tab.
- Repeat the following 4 steps for each device:
- Click on one of the devices.
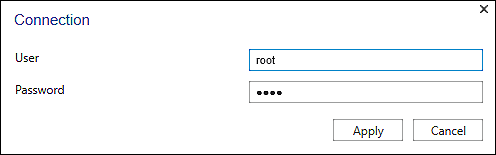
- Click the [Connection] button in the menu ribbon under “Replace firmware”.
- Enter the login information for your device to connect to the device while replacing the firmware (per “root” or “admin”).
- Click [Apply] to confirm your entry.
- Then select one or more devices for which you want to replace the firmware.
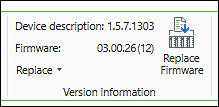
- Click [Replace firmware] in the menu ribbon.
- To determine the current firmware versions of the devices, they are first connected. The “Replace firmware” dialog opens. The existing firmware versions for each device selected are displayed.
- The firmware versions that you previously downloaded that are compatible with the device are displayed in the “Available firmware on the PC” selection field for each device (Backstage view, “Updates & Add-ons” page).
- Select the required firmware version for each device.
- Note
Requirements for displaying the firmware versions:
If no firmware can be selected, check the following requirements:
- SSH must be enabled in the WBM of the controller (default setting).
- The controller must boot from the internal flash (not from a bootable SD card).
- The connection password must have been entered beforehand (see Items 3 to 5).
- The device must have a firmware version for which updates are possible. - A selected firmware version may not be compatible with the version of the device description file used (symbol with blue “i”).
ToolTips display further information. If you select an incompatible firmware version, a compatible device description is installed automatically for the device when replacing the firmware.
If you have stored a firmware file in a directory other than the default directory (C:\ProgramData\WAGO Software\e!COCKPIT\FirmwareRepository), select the “File” option in the selection field. A file browser opens.
There you can select the file directly. Please note that the firmware file must be compatible with the device and your e!COCKPIT version. The file must be in the “.wup” format. 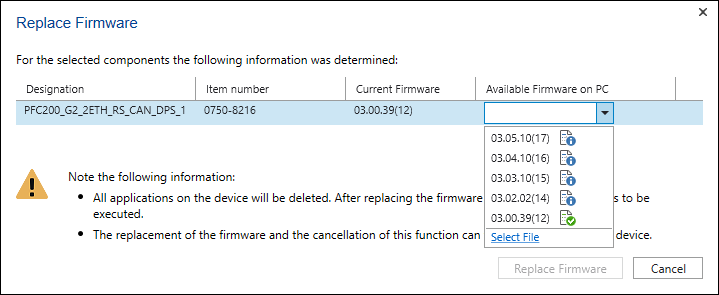
- Click [Replace Firmware] to replace the firmware of the device.
- If you have selected multiple devices, each is processed sequentially. The respective device is first connected, then the firmware is replaced.
The progress bar of a modal dialog shows you the status of the firmware replacement. 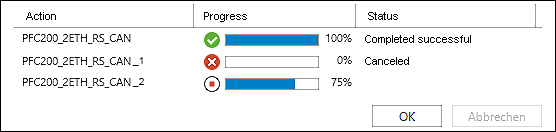
- Note
Replacing the firmware can take a few minutes!
Note that replacing the firmware can take a few minutes depending on the device hardware. The progress bar may be aborted depending on the process. Wait until the process ends with a status message.
- Click [OK] to close the window after replacing the firmware.
- If you want to cancel one running replacement operation prematurely, click on the Cancel icon
 in front of the respective progress bar.
Click the [Cancel] button to cancel all replacement operations. In such case, the previous firmware is restored.
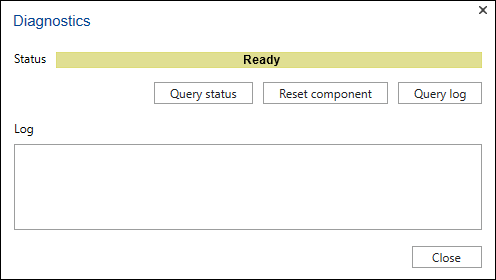
Replace Firmware – Diagnostics
In the event of an error  , messages are output via the message bar.
- To obtain further device information, select the respective device and click the [Diagnostics] button in the menu ribbon under “Replace firmware”.
- A dialog opens.
- Use appropriate buttons to query the status of the device, reset the device (repeat multiple times if necessary) or view the device log file.