Managing BACnet/SC Certificates
- Create a “Controller” entity in the tree structure.
- Click the “TAGS” tab.
- Select the BACnet/SC tag.
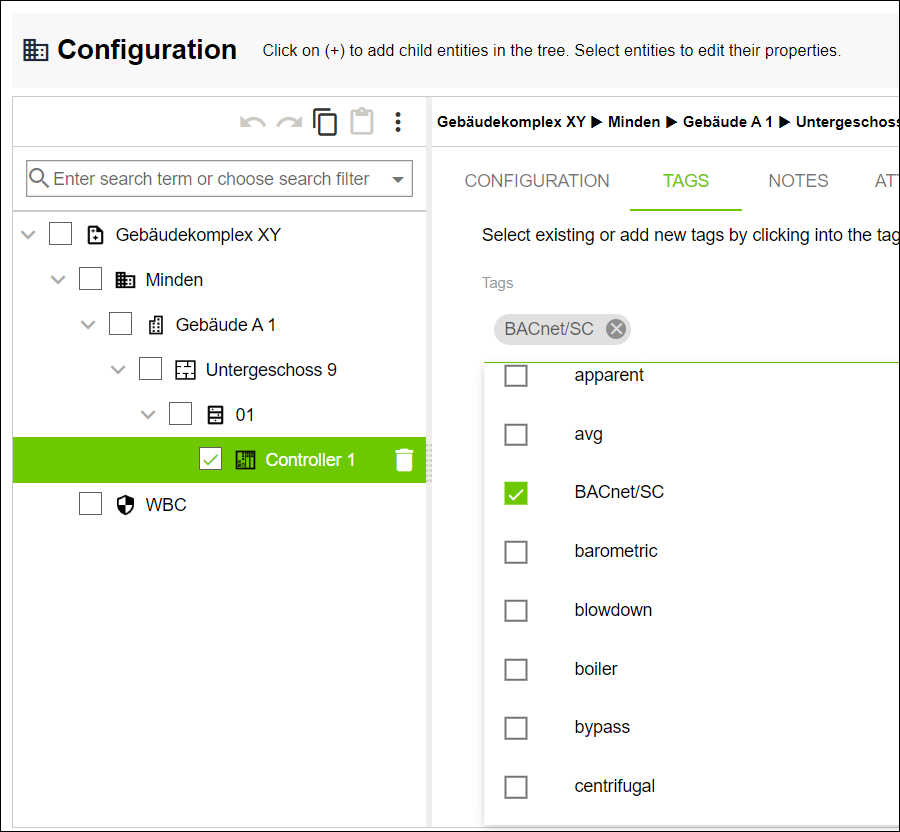
- The selected tag is assigned to the “Controller” entity.
- Click the “Application” menu item in the “Solutions” menu.
- Click [Select File].
- Upload the preconfigured application template.
- Select a created “Controller” entity in the tree structure.

- Drag and drop the Application template onto the created “Controller” entity.
- The Application template is assigned to the “Controller” entity.
- In the “Solutions” menu, click the “Configuration” menu item.
- Select a created “Controller” entity in the tree structure.
- Click the “CONTROLLER” tab.
- Open “Controller Details” > “Device Details.”
- Edit the input fields for the selected controller.
- Click
 .
. - Open “Controller Details” > “WBM.”
 Note
NoteConfiguration for “WBM” only available if input fields are edited under “Device Details”!
The following settings for “WBM” require you to have filled in all the input fields under “Device Details” and saved the settings you have made. If you have not, the settings for “WBM” are not available and are not displayed!
- Click
 .
. - The device model is reloaded, and all linked device instances are updated.
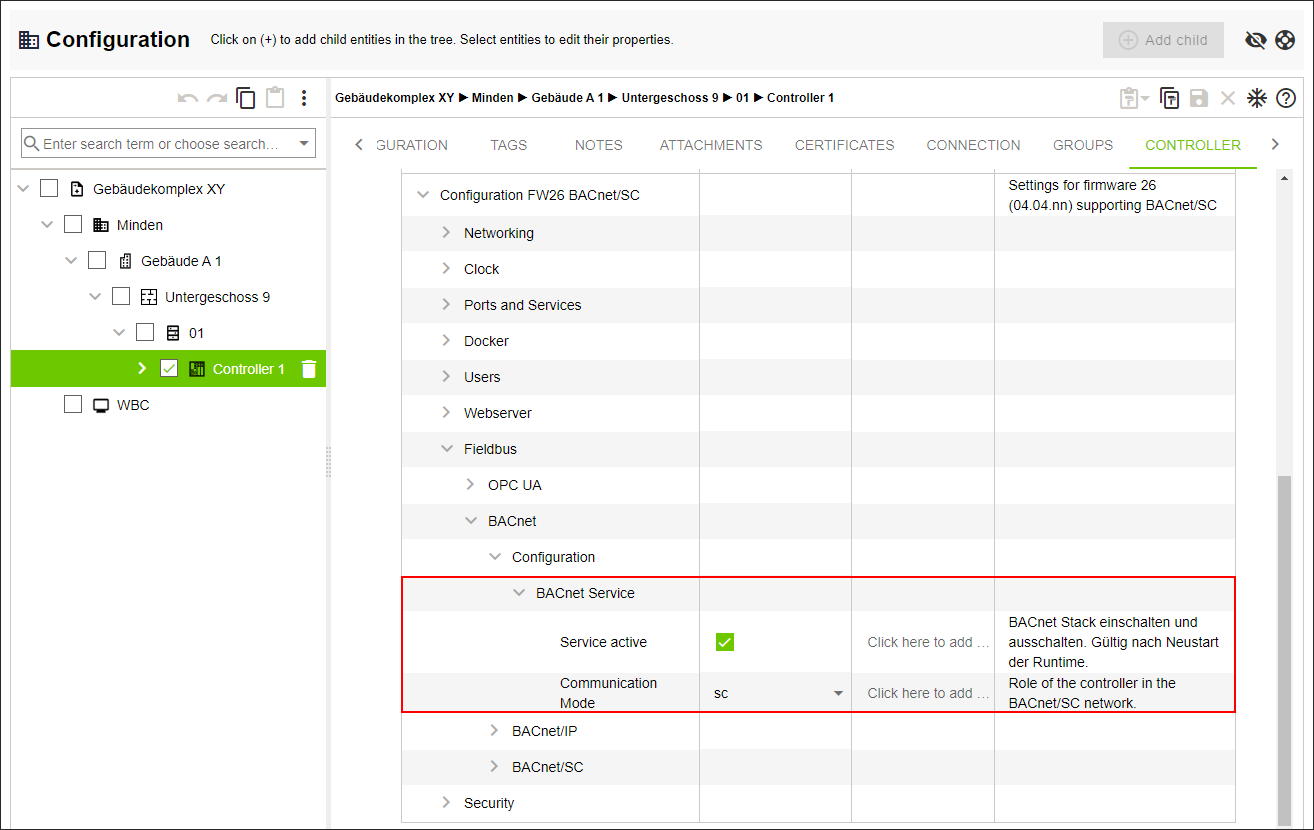
- Open “Controller Settings” > [...] > “BACnet Service.”
- Check the “Service Active” box.
- Select the sc setting in the “Communication Mode” field.
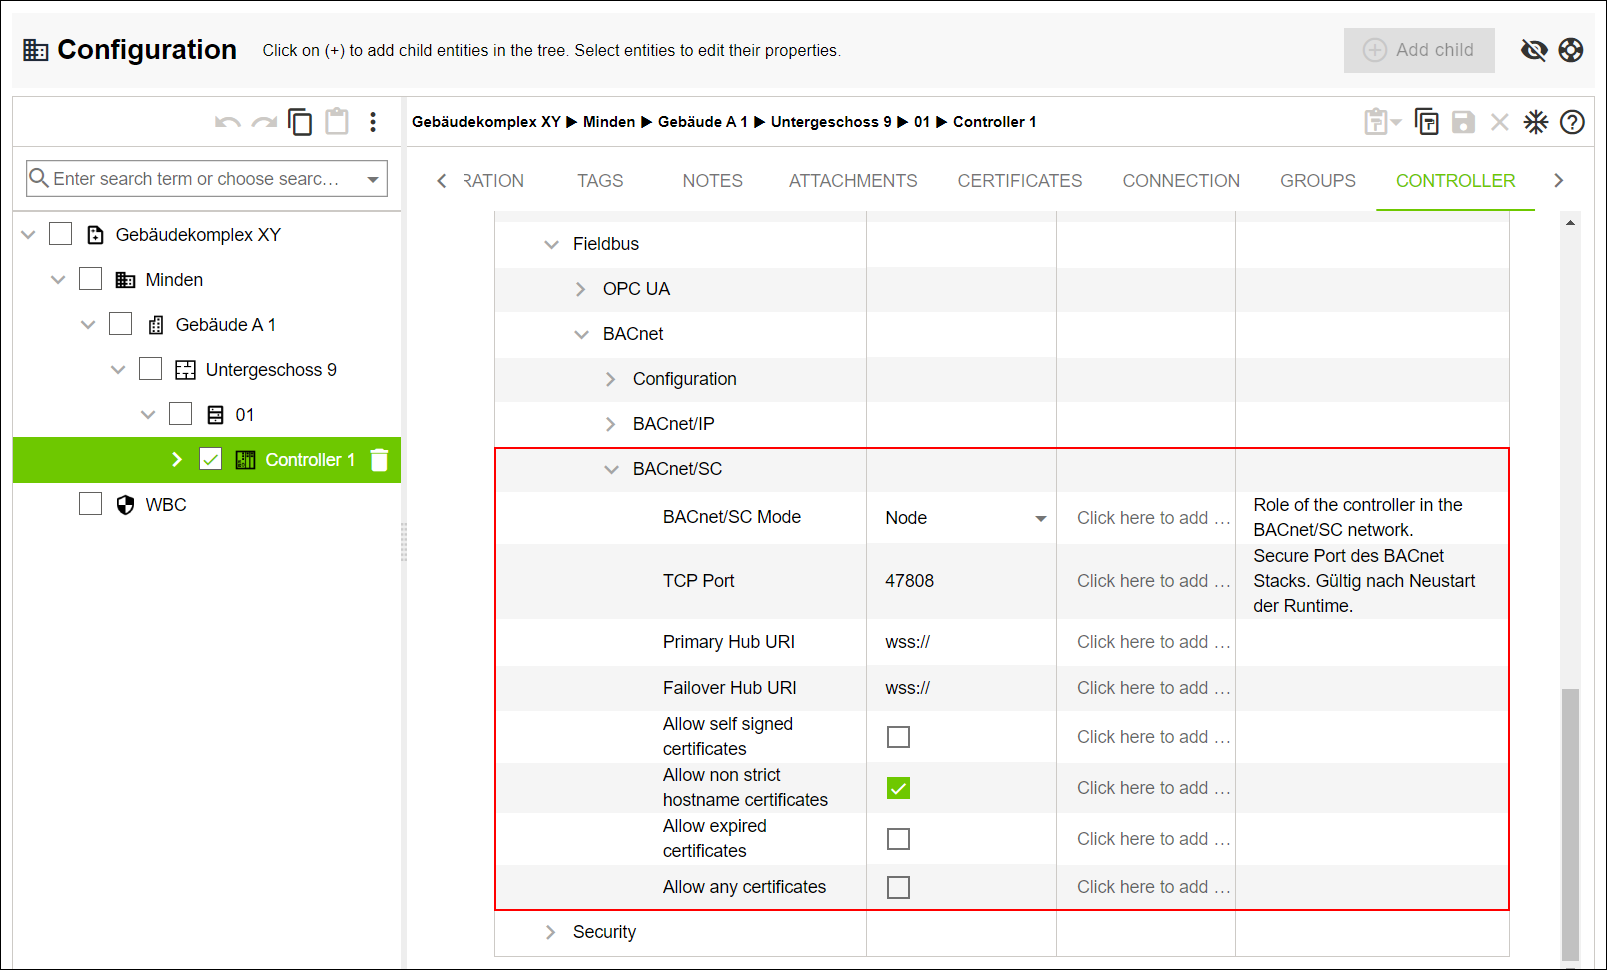
- Open “Controller Settings” > [...] > “BACnet/SC” and then create a BACnet/SC hub.
- Select the Primary Hub setting under “BACnet/SC Mode.”
- Enter port number 47808 in the “TCP Port” field.
- Enter the corresponding URI in the “Primary Hub URI” input field.
The entry must have the following structure: wss://XXX.XXX.XXX.XXX:YYYYY.
Example: If the hub is to be reached at IP address 192.168.178.19 and port 47809 is selected for communication, the entry should be as follows: wss://192.168.178.19:47808. - Enter the corresponding URI in the “Failover Hub URI” input field.
The entry must have the following structure: wss://XXX.XXX.XXX.XXX:YYYYY.
Example: If the hub is to be reached at IP address 192.168.178.19 and port 47809 is selected for communication, the entry should be as follows: wss://192.168.178.19:47808. - Click [Save].
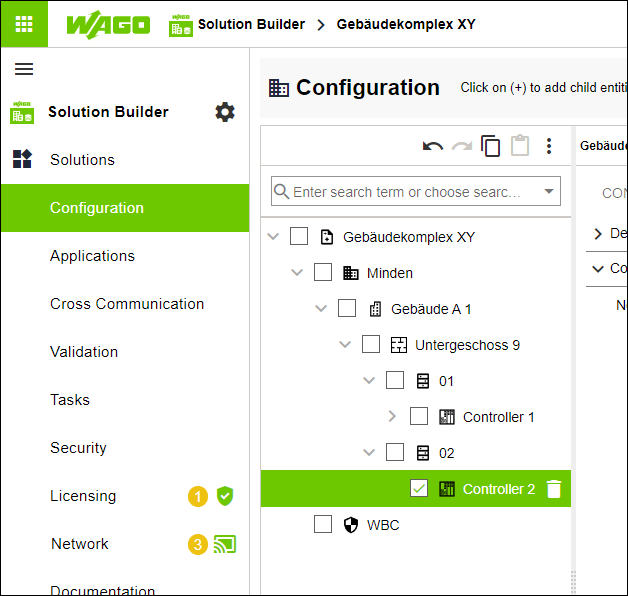
- Repeat the steps for the second controller (Controller 2). Configure it as a BACnet/SC node.
- Select the “Property” entity in the tree structure.
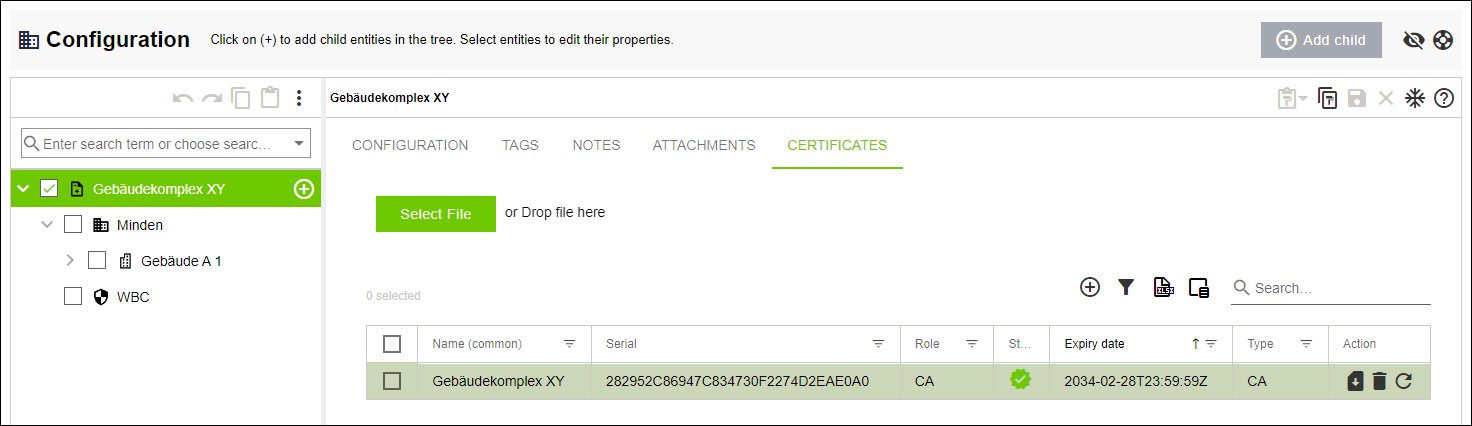
- Click the “CERTIFICATES” tab.
- Click [+] to create a new certificate.
- The “Generate New Certificate” dialog opens.
- Select Certificate Authority from the “Role” drop-down menu.
- Enter the country name in the “Country (C)” field.
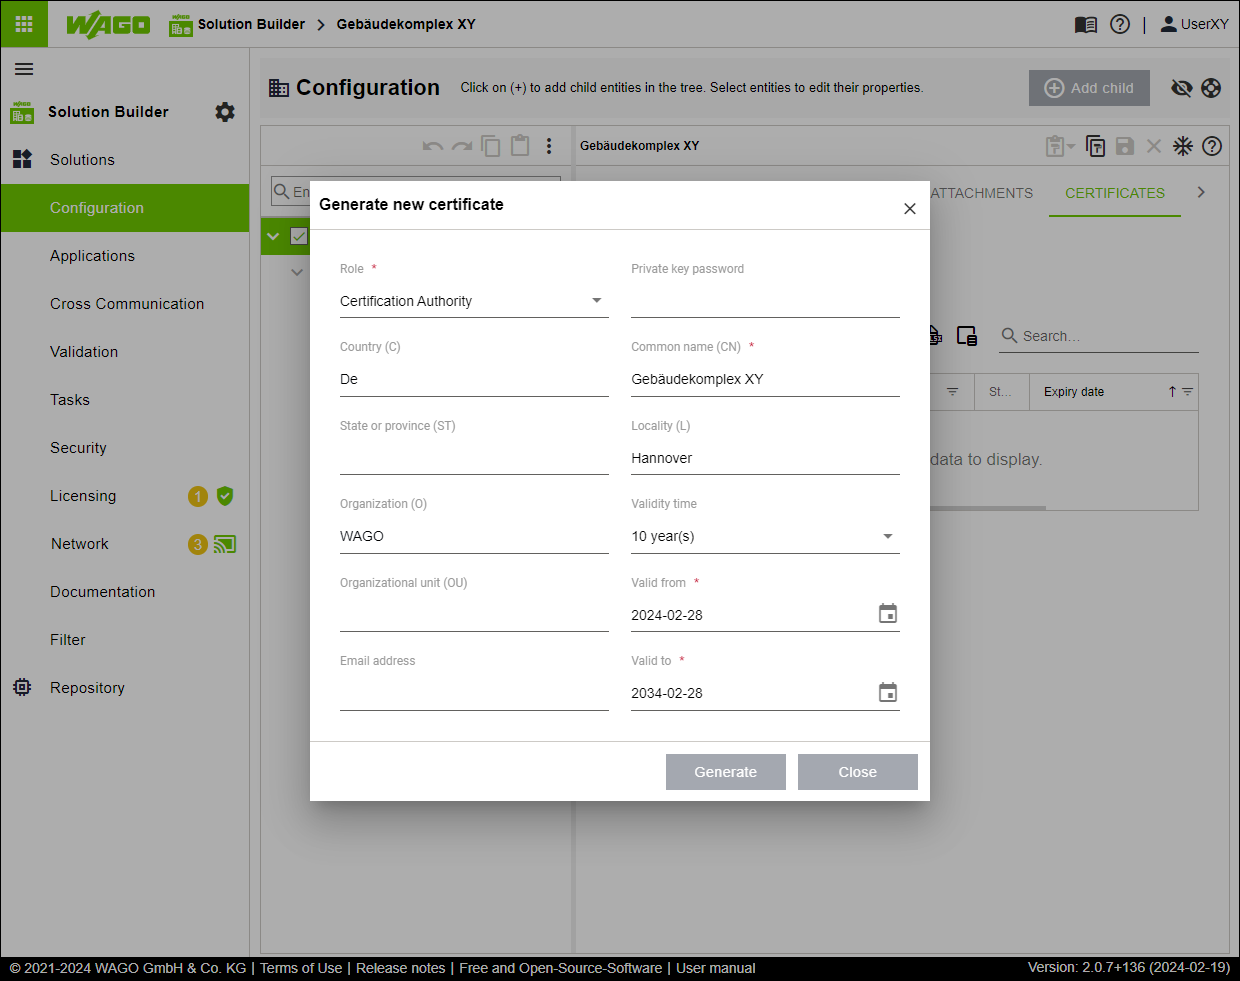
- The form’s remaining input fields are filled in automatically.
- Click [Generate].
- WAGO Solution Builder generates a private key and CA security certificate for itself. These can then be used to sign device certificates.
- Click [Update].
- The “Renew Certificate Authority and Subcertificates” dialog opens.
- Select All from the “Subcertificates Expire within” drop-down menu.
- Select the BACnet/SC certificate from the “Role of New or Renewed Certificates” drop-down menu.
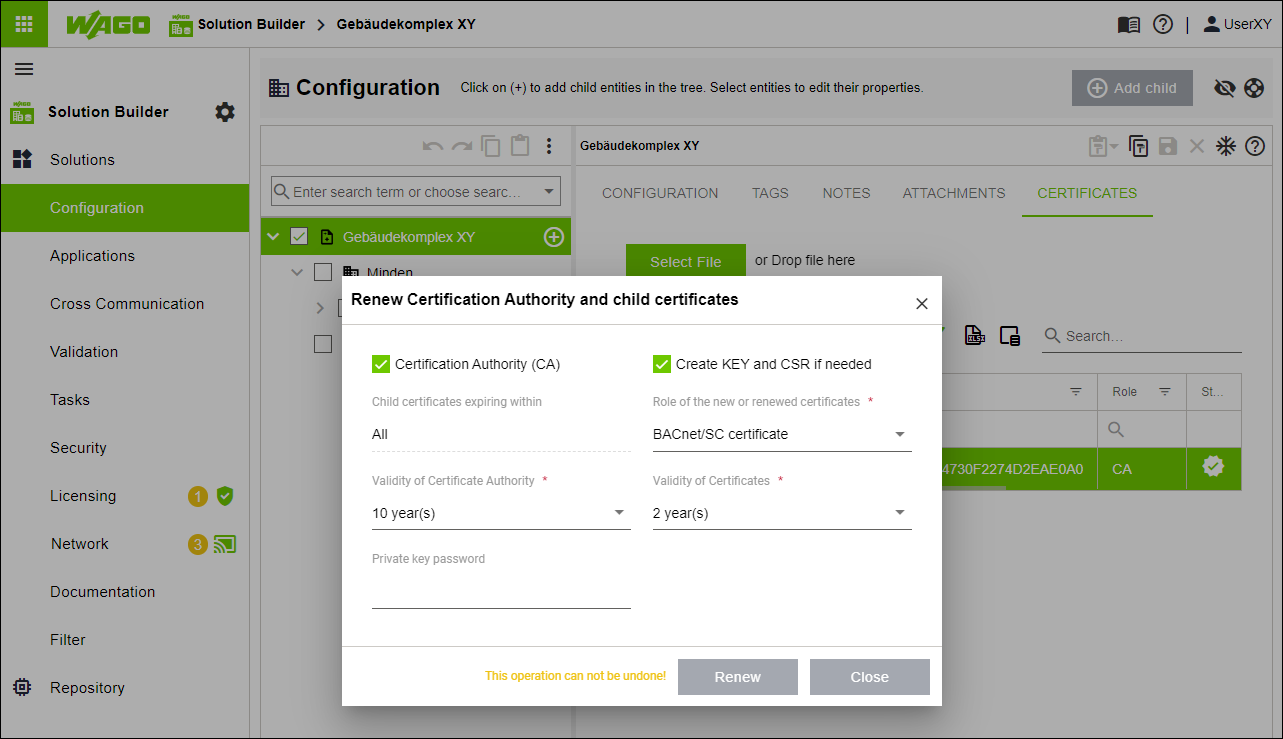
- Click [Renew].
- Create a new node in the tree structure.
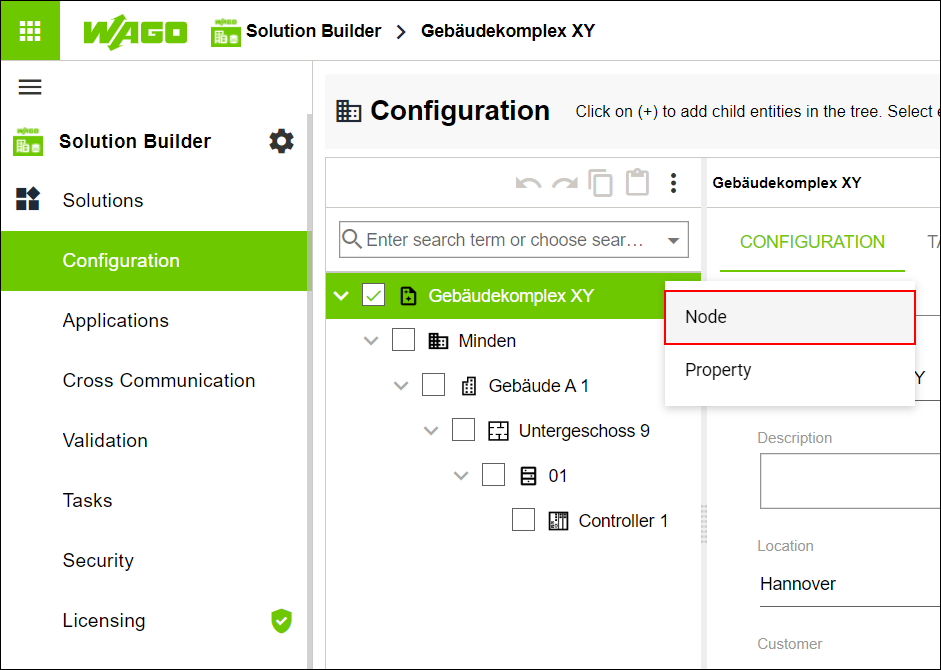
- Rename this node “WBC.”
- Click the “CONNECTION” tab.
- Enter the IP address of your PC in the “Device Address” field.
- The certificate is stored under the IP address you enter.
- Note
Only use the IP address of the PC!
Only enter the IP address of your PC so WAGO BACnet-Konfigurator and all other WAGO software components in your network can also access the certificate you have created. Alternatively, you can also enter the domain name “localhost.”
- Click the “CERTIFICATES” tab.
- Click [+] to create a new certificate.
- The “Generate New Certificate” dialog opens.
- Create a “BACnet/SC certificate” as in the previous steps.
- Select a created “Controller” entity in the tree structure.
- Click the “CERTIFICATES” tab.
- The table view now contains four entries.
- Select the entry of type KEY.
- Click [Export].
- Repeat both steps for the entries of type CRT and CA.
- The generic security certificate is exported and is now ready to be uploaded to WAGO BACnet-Konfigurator (see Configuration in WAGO BACnet Configurator).
- Click “Network” in the “Solutions” menu.
- Click [Merge Detailed].
- The “Synchronize Differences” dialog opens.
- Check whether the “Certificates (BACnet)” entry can be found in the table view and can be synchronized.
- Click [Synchronize].
- WAGO Solution Builder starts the process of synchronization with the Web-Based Management.