Importing/Exporting Program Elements
Elements of the Program view can be exported and reimported in newly created projects. Depending on the application the standard XML format or the PLCopen XML format can be used for exchanging with other development systems.
The [Import/Export] buttons are in the menu ribbon (“PROGRAM” tab > “Import/Export” tab group under “CODESYS V3” or “PLCopen XML”, depending on the required format). Alternatively, access the Import/Export functions via the Backstage view, “Import/Export” page > [CODESYS program elements] or [PLCopen XML program elements].
Exporting
- Click the [Export] button.
- The “Export” dialog window is opened and the Program Structure is displayed.
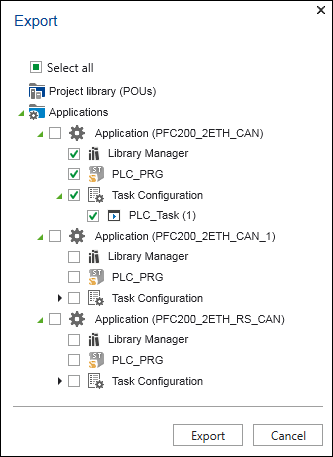
- Tick the elements to be exported.
- If you export in “PLCopen XML” format, the “Save files as individual elements” checkbox also appears. If you want to export individual files per program element instead of an entire XML file, select the checkbox.
- Click [Export].
- Select the storage location in the file selection dialog.
- Export the program elements by clicking [OK].
- The export file or multiple export files are saved.
One directory is created per application or controller. - The directory name corresponds to the application name. The names of the exported files correspond to the names of the respective elements in e!COCKPIT.
If the target directory already contains files, you are prompted for each file whether to overwrite or keep the file. - Click [Yes] to overwrite the file(s).
Importing
- Click the [Import] button.
- This opens a file selection dialog box.
- Select the file(s) to be imported and click [Open].
- The “Import” dialog is displayed.
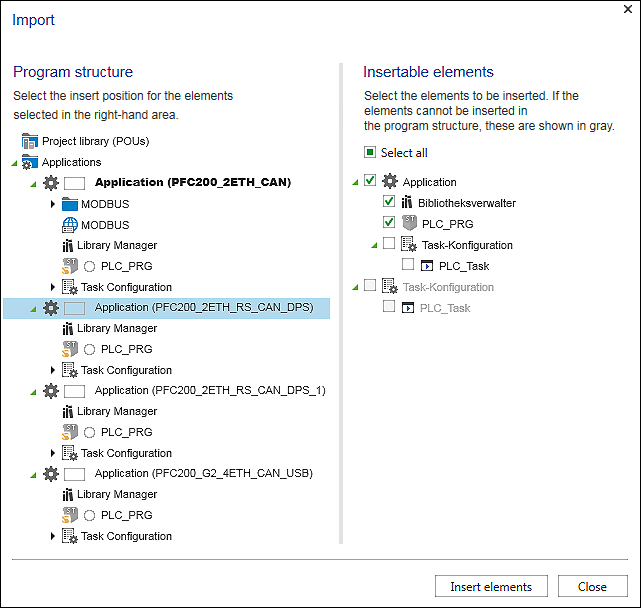
- The Program Structure is displayed in the left-hand area of the dialog. Select the position at which the imported elements should be added.
The content of the import file is displayed in the right-hand area. The content is context-sensitive according to the selection in the Program Structure. If the content to be imported cannot be inserted at the current position in the Program Structure, the relevant objects are grayed out. - To insert the selected elements at the selected insert position, click [Insert Elements].
- The dialog does not close automatically. You can select a succession of elements and insert them at different positions. Multiple selection is also possible. This only allows the simultaneous selection of elements of the same class (e.g., programs). The selected elements are inserted at several positions at the same time.
- Click [Close] to finish the import.
For additional information see:
- Menu Ribbon > “PROGRAM” Tab
- Backstage View > “Import/Export” Page